
You know the story – dream up a renovation, research, go to the store, get started, run into issues, pull your hair out. Right? That’s what step one of preparing for the One Room Challenge was like, anyway. We needed to frame a new wall to update the layout of our kitchen, but it had to be over existing ceramic tile.
Preparing The Existing Wall
After lots of research, it seems that the general consensus is you can definitely build a wall over existing tile. Or hardwoods. Basically anything but carpet (why would you ever do that?!?!). I started with removing the drywall from the existing wall, so I would have access to the studs behind it.

It actually came off pretty easily. I used a hammer to essentially pulverize a hole in the middle, and then once I could get the back of my hammer underneath the metal corner pieces, pieces started coming off in large chunks.

Attempting To Drill The Sole Plate Holes
Soon, I had all the corner pieces off and were down to just the drywall. We pried it off to expose the bare wood. Next, it was time to attach our sole plate to the floor. We measured where our studs would go and began drilling (living in Texas often means no basements, so most houses are on a concrete slab like ours).

If I had only known how much work still lied ahead. I started by using a masonry bit to drill down through the ceramic and into the concrete. Ceramic tile is way harder than concrete, so it took a little while to get through. Eventually, I hit the concrete.
And then? The frustration began. I’d get to a certain depth, and then the bit would just spin. We tried all kinds of things to make it work
- Plugged in
drill for more power - New masonry bits
- Lead anchors/lag bolt/washers
- Hammer drill
- Drilling out the ceramic around where the screw needed to go
so the ceramic didn’t wear down the screw.
After much trial and error, and more frustration than I want to admit, I went back to researching. And I found something really interesting in an article about framing a wall over radiant heating. Basically, the tubes in the heating would get punctured if you drilled into the concrete floor. The solution? C
I managed to get one screw partially into the concrete but failed miserably on the others. I had pretty much given up on using mechanical fasteners at this point. And if construction adhesive is good enough for fancy radiant heating applications, it’s good enough for me.

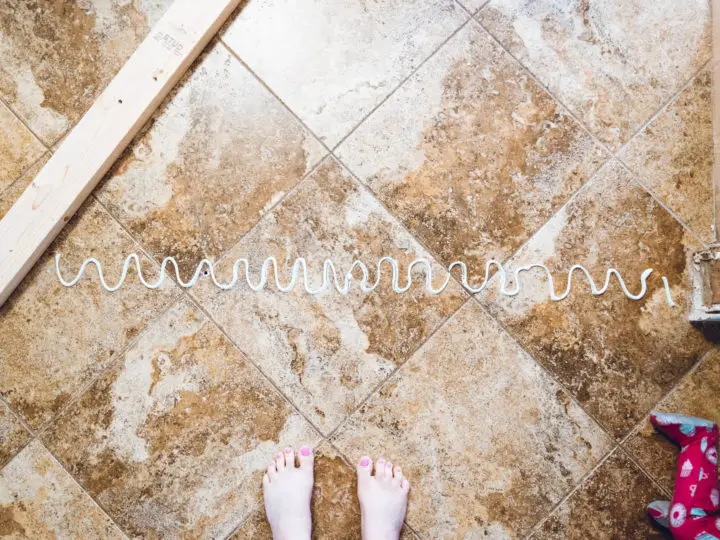
Attaching The Sole Plate With Construction Adhesive
I trotted off to the home improvement store the next morning, picked up some construction adhesive, and glued that puppy to the existing ceramic tile.

It took all of 30 seconds, which is hilarious compared to how long I had been drilling.

I set some heavy objects on top and waited for the glue to dry. In the meantime, I started work on framing out the rest of the wall.
Framing The Rest Of The Wall

Framing was pretty easy. You basically install a board the length of the new wall on the floor and ceiling, and then vertical studs on each end. Then, screw or nail each one to hold them together. I also chose to anchor the sole plate to the existing wall for added stability.

And just like that, I had this beauty. I decided to evenly space the studs at 12.5″ inches instead of the standard 16″. I’ll be hanging heavy-duty shelves over subway tile on them, so I like knowing there’s a little more stability than normal.
Thinking of taking a wall out instead of framing one in? I have a blog for you. It’s all about how you can tell if a wall is load bearing or not.
After a very long two days, I ended Sunday night with some pizza, popcorn, and some Austin East Ciders. Framing a wall over ceramic tile was definitely not easy, but we got it done. Cheers to renovation success, even if the path is a little more winding than we imagined!
Brian fox
Saturday 17th of February 2024
Sooo helpful, I’m about to build wall over same tile with radiant heat under and sounds like you save me a LOT of frustration! What kind of adhesive specifically and is wall still stable?!
Sarah
Sunday 27th of March 2022
Hi,
I'm thinking about doing this, but down the road plan to remove the tile all together. Do you happen to know if you can remove the tile later without messing up the wall? Obviously, the tile right underneath would remain in place.
Catherine
Monday 28th of March 2022
Hi Sarah!
I would say if you're planning to remove the tile altogether down the line, I would go ahead and remove the tile underneath. The height change could make future flooring difficult, though it depends on your subfloor!
Kyle Wiering
Tuesday 28th of December 2021
Thanks for the write up!
Some future renovator might be frustrated by the stud spacing, I've been there lol
Catherine
Thursday 30th of December 2021
Hi Kyle - you are most welcome!
I totally agree - hopefully they have a great stud finder :)
LynJa Malone
Monday 13th of July 2020
I am glad to find there is a adhesive, the will hold down the 2x4, it will save me time in doing what you have already tried to do. I also love that you used L brackets for leveling and sturdiness. Thank you so much.
Kenna
Sunday 6th of November 2022
@Catherine, perhaps cut/chisel out and inch wide path of tile. Great spot for the adhesive and allows easier drilling into the concrete
Catherine
Thursday 13th of August 2020
Thanks for your kind words! It wasn't the route I wanted to take, but it wasn't for lack of trying!